To download textures for Photoshop, visit reputable websites offering high-quality, free, or paid textures. Ensure compatibility with your Photoshop version.
Photoshop users often seek high-quality textures to enhance their designs. Textures add depth, realism, and character to digital artwork. Many websites provide a plethora of textures, ranging from grunge and fabric to abstract and nature-inspired patterns. These textures can be downloaded in various formats suitable for Photoshop.
Before downloading, check the resolution and file type to ensure it meets your project needs. Websites like Textures.com, Unsplash, and Adobe Stock are popular choices. Always verify the licensing terms to avoid legal issues. Incorporating the right textures can significantly elevate the visual appeal of your designs.

Table of Contents
What Are Textures?
Photoshop users know the importance of textures. They add depth and realism to designs. Understanding textures is essential for any designer. But what are textures? Simply put, textures are images or patterns that simulate the appearance of a surface. They can make a flat image look three-dimensional. In Photoshop, textures are vital for adding life to your creations.
Types Of Textures
There are many types of textures you can use in Photoshop. Each type serves a different purpose. Here are some common categories:
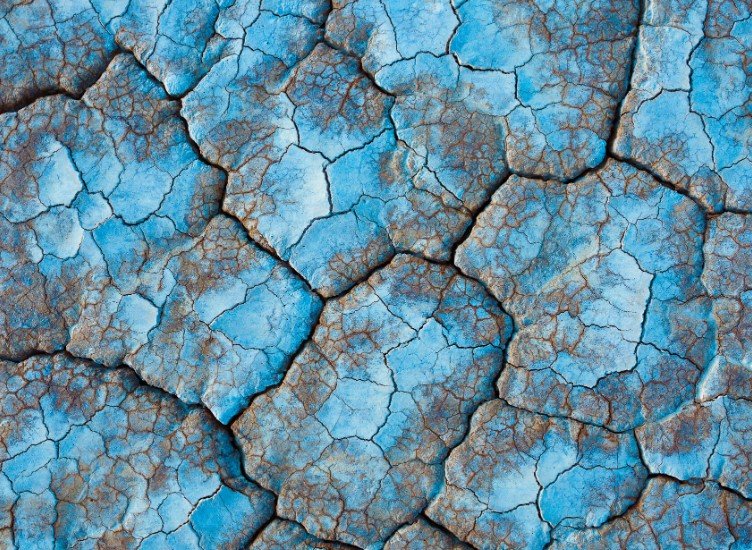
- Natural Textures: These include wood, stone, and water. They mimic elements found in nature.
- Fabric Textures: These are patterns like denim, silk, or wool. They are great for clothing designs.
- Grunge Textures: These give a worn-out look. Use them for a vintage or rugged feel.
- Metal Textures: These mimic surfaces like steel and aluminum. They add a modern touch.
- Abstract Textures: These are more artistic. They include swirls, splatters, and patterns.
Each type of texture has its unique applications. For instance, natural textures are perfect for landscape designs. Fabric textures work well in fashion illustrations. Grunge textures bring a retro vibe to your work. Understanding these categories helps you choose the right texture for your project.
Common Uses In Design
Textures are versatile in design. They can enhance various aspects of your work. Here are some common uses:
- Backgrounds: Textures can create interesting backgrounds. A grunge texture can make a plain background look dynamic.
- Text Effects: Apply textures to text for a unique look. For example, a metal texture can make text appear as if it’s made of steel.
- Photo Manipulation: Textures can add realism to edited photos. For instance, adding a water texture to a dry surface can simulate rain.
- Web Design: Use textures in web design to create engaging interfaces. A subtle fabric texture can make a website feel more tactile.
- Digital Art: Artists use textures to add depth to their digital paintings. A stone texture can make a digital wall look real.
Textures are also useful in branding. They can make logos stand out. A unique texture can set your design apart. By understanding how to use textures, you can elevate your designs to a new level.
Finding Textures Online
Textures add depth and realism to your Photoshop projects. Whether you’re designing a website, creating digital art, or enhancing photos, the right texture can make a world of difference. Finding high-quality textures online is crucial. Let’s explore some of the best places to download textures for Photoshop.
Free Resources
Many websites offer free textures for Photoshop. These resources provide a wide variety of textures without costing you a dime. Here are some top sites to consider:
- Unsplash: A vast library of high-resolution photos, including many textures. Free for commercial and personal use.
- Pexels: Another excellent site for free stock photos. Search for textures and find a plethora of options.
- Texture Haven: Provides high-quality textures in various categories like concrete, fabric, and metal. All textures are free to use.
- Freepik: Offers free textures along with other design resources. Make sure to check the license for each texture.
To help you compare, here’s a quick table of features:
| Website | License | Categories | Quality |
|---|---|---|---|
| Unsplash | Free for commercial use | Various | High |
| Pexels | Free for commercial use | Various | High |
| Texture Haven | Free for commercial use | Concrete, Fabric, Metal, etc. | High |
| Freepik | Free with attribution | Various | High |
Paid Options
For those who need exclusive or premium textures, paid options are available. Paid resources often offer better quality and a wider selection. Here are some top choices:
- Adobe Stock: High-quality textures directly integrated with Photoshop. Offers a subscription model.
- Shutterstock: Extensive library of textures. Pay per download or subscribe for a monthly plan.
- Creative Market: A marketplace for designers. Purchase individual textures or bundles.
- Texture King: Offers premium textures in high resolution. Pay once and download unlimited times.
To make an informed choice, refer to this comparison table:
| Website | License | Categories | Quality | Price |
|---|---|---|---|---|
| Adobe Stock | Commercial use | Various | Very High | Subscription |
| Shutterstock | Commercial use | Various | Very High | Subscription or Pay per download |
| Creative Market | Commercial use | Various | Very High | Pay per item |
| Texture King | Commercial use | Various | Very High | One-time payment |
Installing Textures In Photoshop
Photoshop offers an array of tools to enhance your creative projects. One such feature is the ability to download and install textures. Installing textures in Photoshop can elevate your designs, adding depth and realism. This guide will walk you through the process and help you troubleshoot common installation issues.
Step-by-step Guide
Installing textures in Photoshop is a straightforward process. Follow these steps to get started:
- Download your texture files: First, find and download the texture files you want to use. Ensure they are in a compatible format like JPEG or PNG.
- Open Photoshop: Launch your Photoshop application.
- Open the Preset Manager: Go to Edit > Presets > Preset Manager.
- Select the appropriate preset type: From the drop-down menu, choose ‘Patterns’ or another type relevant to your texture.
- Load the texture files: Click on the ‘Load’ button, navigate to your downloaded textures, and select them.
- Save your textures: Once loaded, save them for easy access in future projects.
Here’s a quick reference table for these steps:
| Step | Action |
|---|---|
| 1 | Download texture files |
| 2 | Open Photoshop |
| 3 | Open Preset Manager |
| 4 | Select preset type |
| 5 | Load texture files |
| 6 | Save textures |
Troubleshooting Installation
Sometimes, you might face issues while installing textures. Here are some common problems and their solutions:
- Texture files not appearing: Ensure your files are in a compatible format like JPEG or PNG. Check if you selected the correct preset type in the Preset Manager.
- Photoshop crashing: This could be due to a corrupted file. Try downloading the texture again. If the issue persists, update your Photoshop to the latest version.
- Textures not loading properly: This may happen if the texture file is too large. Resize the texture to a smaller dimension and try loading it again.
- Missing presets: Sometimes, newly added textures might not show up. Restart Photoshop to refresh the presets.
Refer to this troubleshooting table for quick fixes:
| Problem | Solution |
|---|---|
| Texture files not appearing | Check file format and preset type |
| Photoshop crashing | Download texture again or update Photoshop |
| Textures not loading | Resize the texture file |
| Missing presets | Restart Photoshop |
Using Textures In Projects
Using textures in Photoshop projects can transform your designs from ordinary to extraordinary. Textures add depth, character, and life to your work. Whether you’re working on a digital painting, photo manipulation, or graphic design, textures can enhance your creativity. Downloading textures for Photoshop is the first step. Let’s explore how to use these textures effectively in your projects.
Layering Techniques
Layering techniques are essential for using textures in Photoshop. By layering textures, you can create complex and rich designs. Here are some key tips:
- Organize your layers: Keep your layers well-organized. Name each layer to easily identify it later.
- Use Adjustment Layers: Adjustment layers help you make non-destructive edits. You can tweak color, contrast, and brightness without altering the original texture.
- Masking: Masks allow you to hide or reveal parts of a layer. Use masks to blend textures seamlessly.
Consider the following table for quick reference on layering techniques:
| Technique | Description |
|---|---|
| Adjustment Layers | Non-destructive color and contrast adjustments. |
| Layer Masks | Hide or reveal parts of a layer. |
| Smart Objects | Preserve an image’s source content with all its original characteristics. |
Using these techniques, you can create stunning designs with multiple textures.
Blending Modes
Blending modes are another powerful tool for using textures. They determine how a layer blends with the layers beneath it. Here are some common blending modes and their effects:
- Multiply: Darkens the base color to reflect the blend color. Great for adding shadows.
- Screen: Brightens the base color to reflect the blend color. Perfect for highlights.
- Overlay: Combines Multiply and Screen modes. It enhances contrast.
Experiment with these blending modes to see which works best for your project. Here is a brief overview of a few blending modes:
| Blending Mode | Effect |
|---|---|
| Multiply | Darkens the image, useful for shadows. |
| Screen | Lightens the image, ideal for highlights. |
| Overlay | Increases contrast by combining Multiply and Screen. |
Blending modes can dramatically change the look of your textures. Try different modes to achieve the desired effect.
Creating Custom Textures
Photoshop users often seek unique textures to enhance their designs. Creating custom textures allows designers to add a personal touch to their projects. This process can be both fun and rewarding. Let’s explore two main methods for creating custom textures: Photography Techniques and Digital Creation.
Photography Techniques
Photography is a great way to create custom textures. Capturing real-world surfaces can give your designs an authentic feel. Here are some tips to get started:
- Choose Interesting Subjects: Textures can be found everywhere. Look for surfaces like wood, metal, fabric, and stone.
- Lighting is Key: Good lighting enhances texture details. Natural light works best, but you can also use artificial light.
- Use a Tripod: A tripod ensures stability, helping you capture sharp images.
- Experiment with Angles: Different angles can reveal unique aspects of the texture.
- Edit Your Photos: Use Photoshop to adjust contrast, brightness, and saturation to highlight texture details.
Here is a table summarizing the key points:
| Tip | Description |
|---|---|
| Choose Interesting Subjects | Look for surfaces like wood, metal, fabric, and stone. |
| Lighting is Key | Use natural or artificial light to enhance details. |
| Use a Tripod | Ensures stability for sharp images. |
| Experiment with Angles | Reveal unique aspects by changing angles. |
| Edit Your Photos | Adjust contrast, brightness, and saturation in Photoshop. |
Digital Creation
Creating textures digitally offers endless possibilities. You can use various Photoshop tools to design unique textures. Here’s how:
- Start with a Blank Canvas: Open a new document in Photoshop. Set the dimensions to your preference.
- Use the Brush Tool: Experiment with different brushes and settings. Create patterns by varying brush sizes and opacity.
- Apply Filters: Filters like Noise, Blur, and Emboss can add depth and complexity.
- Layer Styles: Use layer styles such as Bevel, Emboss, and Drop Shadow to enhance texture effects.
- Combine Techniques: Mix photography textures with digital elements for a unique look.
These steps can help you create stunning textures:
- Blank Canvas: Set dimensions as needed.
- Brush Tool: Experiment with sizes and opacity.
- Filters: Add depth with Noise, Blur, and Emboss.
- Layer Styles: Enhance with Bevel, Emboss, and Drop Shadow.
- Combine Techniques: Merge photo textures with digital designs.
Creating custom textures for Photoshop is a creative process. It allows designers to add a unique touch to their projects. Whether using photography or digital tools, the possibilities are endless.

Popular Texture Styles
Photoshop users know the importance of textures. Textures add depth and realism to digital art. They can transform simple designs into stunning visuals. Among the many texture styles, some are more popular. Let’s explore some popular texture styles for Photoshop.
Grunge And Vintage
Grunge and vintage textures bring an old, worn-out feel to your designs. These textures add character and history to digital art. They are perfect for creating aged and distressed looks. Here are some features of grunge and vintage textures:
- Roughness: Grunge textures often have a rough, gritty feel.
- Scratches and Stains: Vintage textures include scratches, stains, and other imperfections.
- Muted Colors: These textures usually have muted, earthy tones.
Grunge and vintage textures are ideal for:
- Album covers
- Posters
- Backgrounds for websites
Using these textures can make your designs stand out. They evoke a sense of nostalgia and raw energy. Here is a comparison table for better understanding:
| Feature | Grunge | Vintage |
|---|---|---|
| Surface | Rough | Worn-out |
| Color Tone | Dark | Muted |
| Common Use | Edgy Art | Retro Designs |
Minimalist And Clean
Minimalist and clean textures bring simplicity and elegance to designs. These textures focus on subtle details and smooth surfaces. They are great for modern and professional looks. Here are some features of minimalist and clean textures:
- Smoothness: Minimalist textures have smooth, even surfaces.
- Neutral Colors: These textures often use neutral, soft colors.
- Subtle Patterns: Minimalist textures feature subtle, repeating patterns.
Minimalist and clean textures are ideal for:
- Corporate designs
- Website backgrounds
- Modern art
These textures create a sense of calm and clarity. They are perfect for projects that need a sleek and polished look. Here is a comparison table for better understanding:
| Feature | Minimalist | Clean |
|---|---|---|
| Surface | Smooth | Even |
| Color Tone | Neutral | Soft |
| Common Use | Modern Art | Corporate Designs |
Texture Packs For Specific Themes
Photoshop users often seek unique textures to enhance their designs. Texture packs tailored for specific themes can greatly improve creative projects. These packs save time and ensure consistency. Here, we’ll explore two popular themes: Nature and Landscape and Urban and Industrial.
Nature And Landscape
Nature and landscape textures bring the beauty of the outdoors into your designs. These packs include elements such as:
- Forest floors with leaves and twigs
- Rocky cliffs and boulders
- Water surfaces, like lakes and rivers
- Sand dunes and desert textures
Such textures can add a realistic touch to nature-themed projects. For example, a designer can use a water surface texture to create a serene lake scene. Forest floor textures can make a woodland background more authentic.
Here’s a table showcasing some popular Nature and Landscape texture packs:
| Texture Pack | Description | Usage |
|---|---|---|
| Forest Floor Pack | Includes leaves, twigs, and dirt textures | Woodland backgrounds |
| Rocky Cliffs Pack | Textures of various rock formations | Mountain scenes |
| Water Surfaces Pack | Reflective water textures | Lake and river designs |
Urban And Industrial
Urban and industrial textures give a gritty, modern feel to your designs. These packs often feature:
- Concrete walls with cracks and graffiti
- Rusty metals and corroded surfaces
- Brick walls with aged textures
- Asphalt roads with markings
Using these textures, designers can create urban landscapes that feel lived-in and real. For instance, a rusty metal texture can give a project an industrial vibe. Concrete wall textures can be used to create a gritty street scene.
Here’s a table showcasing some popular Urban and Industrial texture packs:
| Texture Pack | Description | Usage |
|---|---|---|
| Concrete Walls Pack | Cracked and graffiti-covered walls | Urban street scenes |
| Rusty Metals Pack | Corroded metal surfaces | Industrial designs |
| Brick Walls Pack | Aged and weathered brick textures | Old buildings |
Best Practices For Texture Use
Using textures in Photoshop can transform ordinary images into stunning artworks. Textures add depth, realism, and visual interest. However, to achieve the best results, following best practices is crucial. This section will guide you on the best practices for texture use, focusing on resolution considerations and maintaining quality.
Resolution Considerations
Resolution plays a vital role in the effectiveness of textures. High-resolution textures ensure clarity and detail. Low-resolution textures can make images look pixelated and unprofessional.
Here are some key points to consider:
- Higher resolution textures (300 DPI or more) are ideal for print projects.
- For web use, 72 DPI is standard, but higher resolutions can offer better quality.
- Match the texture resolution to your project’s resolution to maintain consistency.
Example Resolution Guide:
| Project Type | Recommended Resolution |
|---|---|
| Print (Posters, Flyers) | 300 DPI or higher |
| Web (Websites, Social Media) | 72 DPI or higher |
Always check the texture resolution before downloading. This ensures you get the best quality for your work. High-resolution textures might take up more storage space but offer better flexibility and detail.
Maintaining Quality
Maintaining quality is essential when using textures. Poor quality textures can ruin an otherwise excellent design.
Follow these best practices to maintain quality:
- Use non-destructive editing techniques. This allows you to edit textures without losing original quality.
- Save textures in high-quality formats like PNG or TIFF. Avoid lossy formats like JPEG unless necessary.
- Resize textures carefully. Always resize proportionally to avoid distortion.
Example Quality Maintenance Tips:
| Tip | Description |
|---|---|
| Non-Destructive Editing | Use layers and masks in Photoshop to preserve the original texture. |
| High-Quality Formats | Save in PNG or TIFF to maintain clarity and detail. |
| Careful Resizing | Always use the ‘Constrain Proportions’ option when resizing. |
Regularly check your textures during the design process. This ensures you maintain the highest quality throughout your project. High-quality textures contribute to professional and polished final results.
Conclusion
Enhance your Photoshop projects with high-quality texture downloads. These textures add depth and realism to your designs. Experiment with various textures to discover new creative possibilities. Start downloading today and elevate your graphic design work to the next level. Happy designing!